Signing your tenancy agreement – simplified

You said ‘Don’t like how you send out the tenancy agreement’; we said…
Last year, tenants gave us feedback saying we should simplify the process of signing the tenancy agreement, when securing your student accommodation. We listened to what you said and this year you’ll find it much simpler to manage your tenancy application and sign your contract.
We have made it easier to manage this part of the process by moving it online, with the help of a company called StuRents. You can check your tenancy agreement and send us your documents using a simple to follow process that is completely online.
Step 1 – check your inbox
Once your group has found the house you’d like to rent for in the next academic year, we will send each of you an email:
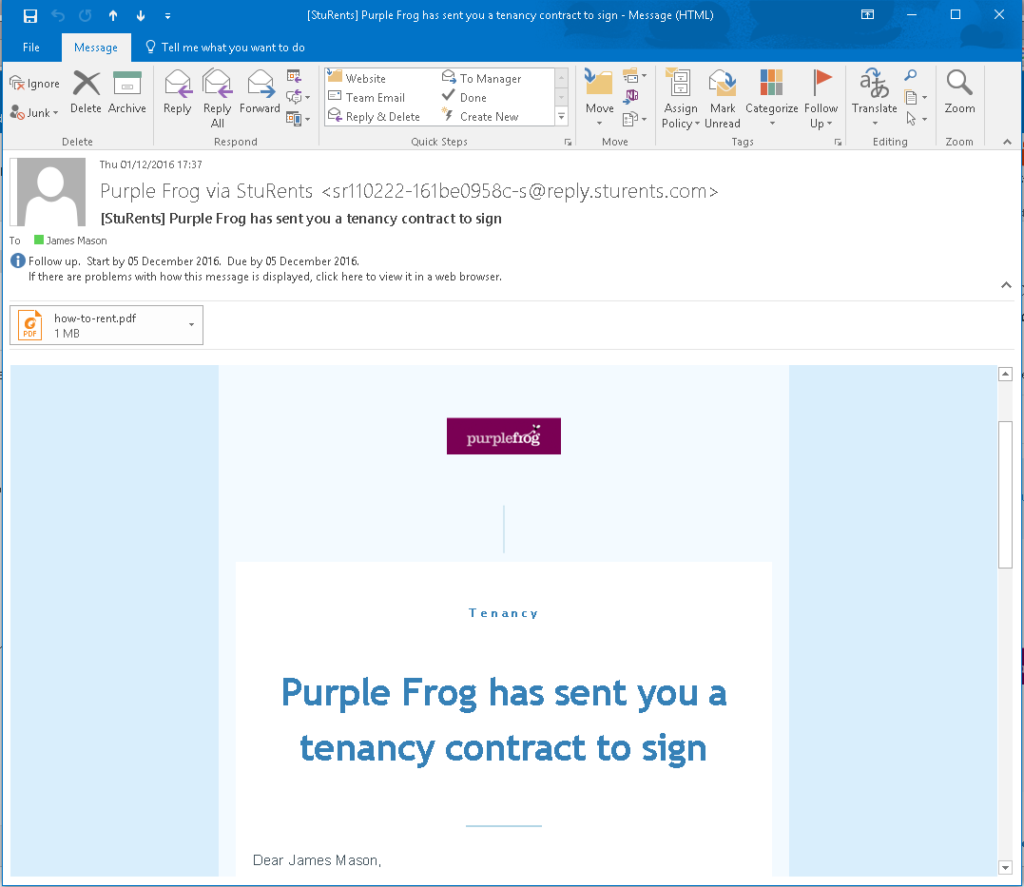
The email will also give you the cut off date for completing the online form and uploading your information – this is five working days.
At the bottom of this email, you’ll find a button. Click it and it will send you to the StuRents’ website.
Each member of the group will receive an email. Each one is unique to each recipient, so there’s no need to forward the email around. If anyone in the group doesn’t receive their email, let us know. But make sure they’ve checked their junk folder first!
Step 2 – create an account
The link you clicked in the email is unique to you. So when you accept your StuRents invite, your name and email address should already be pre-filled. You simply have to choose a password and click Sign-Up.
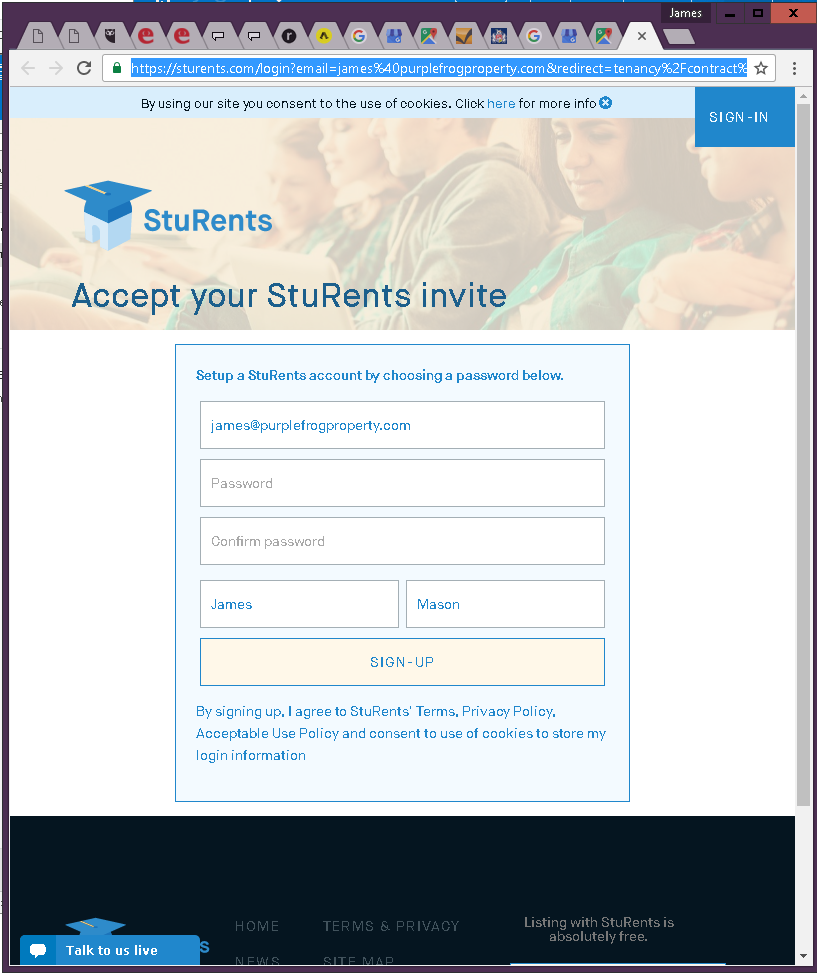
This will send you to a bespoke page, where you will be able to check your contract and upload the information we need to create your tenancy.
Step 3 – read the contract
When you sign in, you’ll see that the page is split into two columns. The larger column on the left is the contract. You will need to read this and make sure that you’re clear on what it says. You can scroll up and down this column.
The contract will set out the requirements and responsibilities of the landlord, Purple Frog as the landlord’s agent, and you as the tenant. You will be able to see information such as the landlord’s name and contact details, our contact details and the amount of deposit you will need to pay.
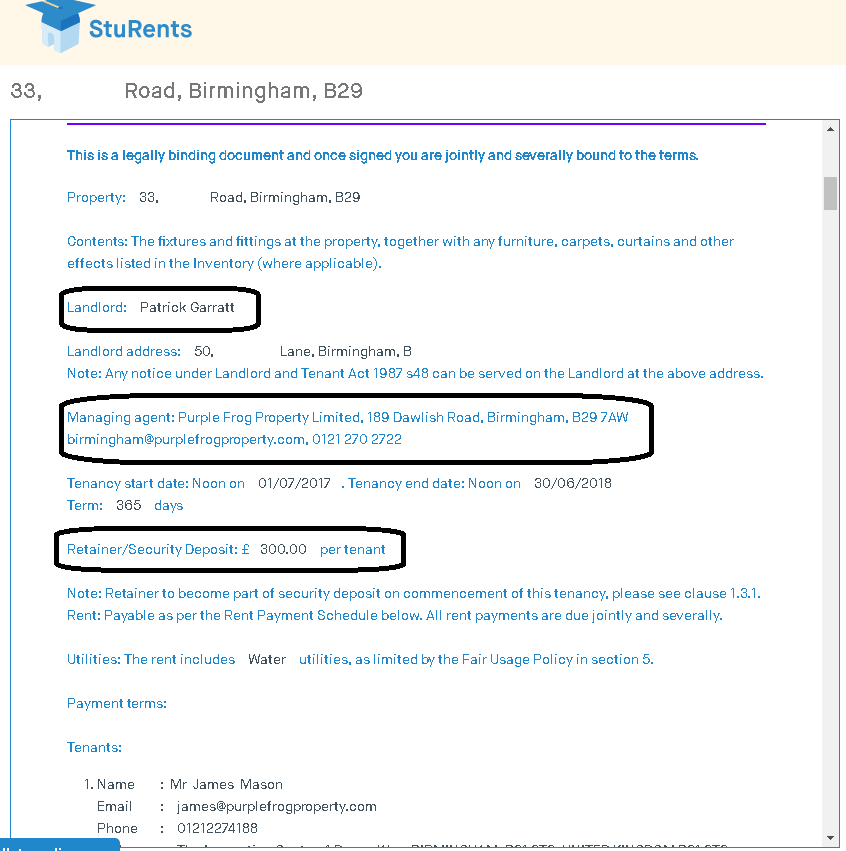
It’s a great idea to have someone else read the contract on your behalf, too. A parent or someone who’s going to act as your guarantor (if that’s not one of your parents), is the ideal person. Your university or SU accommodation office will also be able to cast an eye over it for you.
There’s a handy ‘Share this contract’ link in the right hand column, to make it easier to share the contract before you sign it.
Remember, the contract is a legal document. Reading it after you’ve signed it is too late. If you’re not sure about something in the contract, ask us! Also, once in a while, an error might creep in. If you see something amiss, tell us and we’ll amend it!
Step 4 – Your guarantor
The right hand column is where you will need to add your details and upload your documents. As part of this process, you will need to give the name and an email address for your guarantor.
We realise that some guarantors might not have their own email address. If this is the case, there’s two options:
- Create an email account for them – there’s lots of free ones out there. My personal favourite is gmail, which you can sign up for here: https://accounts.google.com/SignUp. But there are lots available.
- Use an email address that they can access. For instance, a secondary account that you own.
Please note, you can’t use the same email address for the guarantor as you are using as the tenant.
Your guarantor will be sent an email similar to the one that you got sent in Step 1.
Step 5 – upload your documents
As part of your application, you’ll be asked for different types of information. So, make sure you have these on hand.
They are:
- Name of your university
- Name of your course
- Year of study
- Your student number
You will also have to upload copies of some documents. The system is easy: simply click ‘Choose File’ where prompted and navigate to where you’ve saved the image file for this piece of ID.
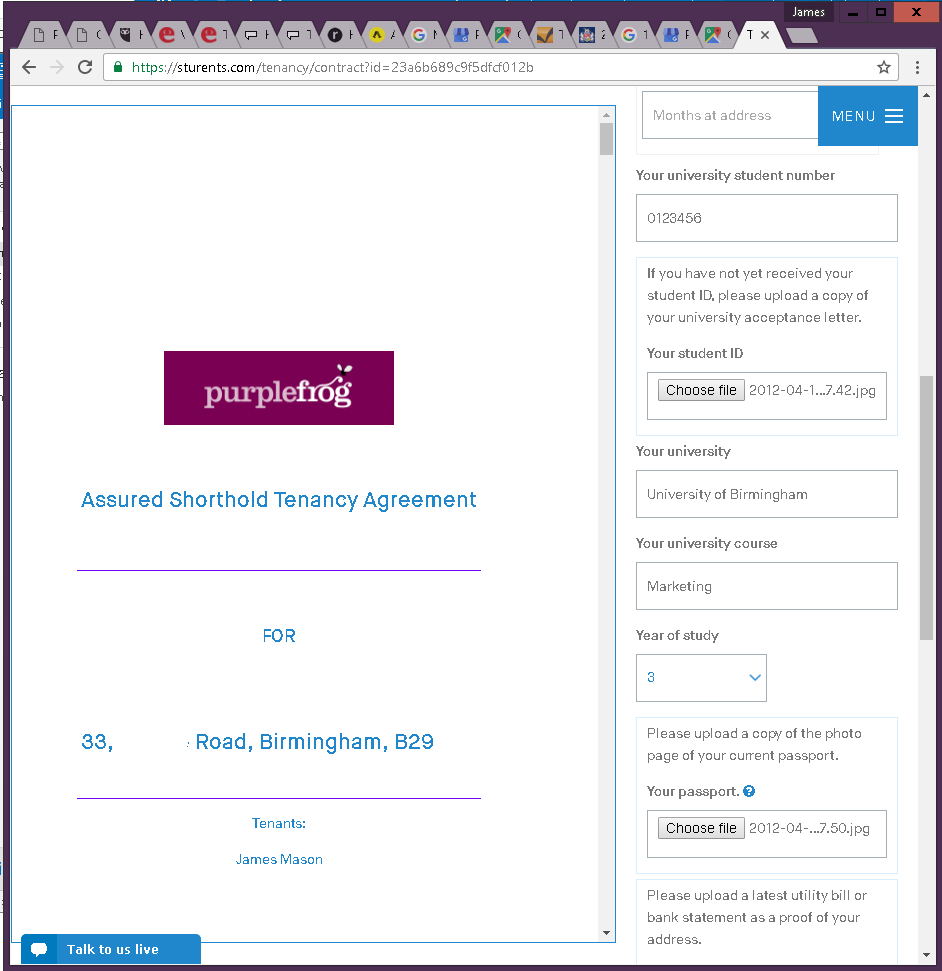
You’ll need to provide three pieces of ID:
- Current student ID
- Passport / photo ID
- Proof of address (your main address/place you call home)
There’s details of the types of ID you can use, here: www.purplefrogproperty.com/identity-documents-required.
You can upload the documents in all of the ‘classic’ image file formats – Jpeg, PNG and PDF. This means that you can photograph the document using the camera on your phone, if you don’t have anything as old fashioned as a scanner.
Step 6 – Sign the contract
Once you’ve filled in the form, you can sign the contract! Yah! Simply scroll to the end of the document in the left hand column. There will be a box next to the tenant signature. Use the mouse to draw your signature into the box, just like when you have to sign for a parcel.
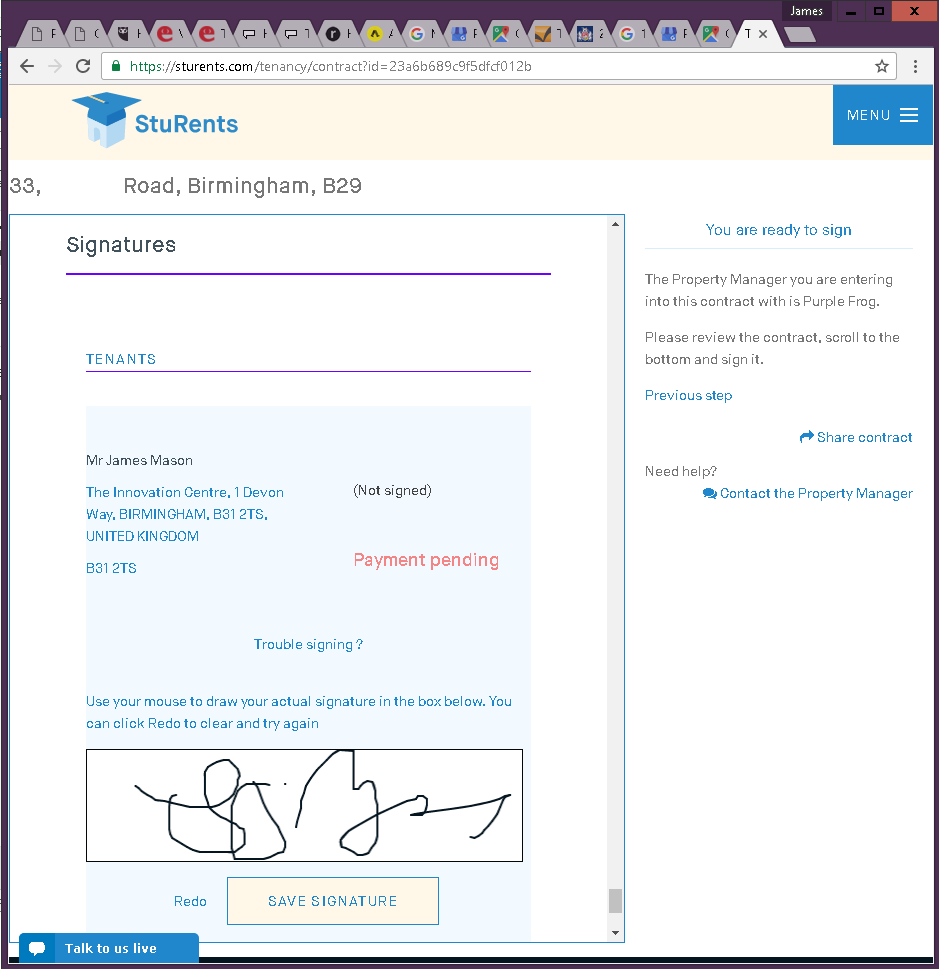
You will need to pay a £1 admin fee to StuRents and that’s it – you’re done!
If you have any technical problems, StuRents has a live chat facility. If you accidentally put some incorrect information on the form, there are forward and back tabs so you can move around the form. Or you can let us know and we’ll help, too.
What happens next?
Your guarantor will also need to complete their version of the form. If your guarantor has any questions about the process, there is an FAQ for guarantors on the website.
When you submit your form, it and your documents are sent to us. We will check and confirm your application. This may take a few days, please bear with us. Once we’ve confirmed your application, we ask you to pay your retainer. Later this will become your deposit.
There are more details about the process on our page about securing your student accommodation.
